Saturday, May 29, 2010

Red and green ratatouille

The third day of absolutely freezing cold wet windy Wellington weather. Fortunately there's enough food in the house not to have to brave the supermarket. I keep putting off just dashing into the garden for a handful of herbs. Time for something warm and comforting, but I don't feel like making another casserole, and we need to eat more veges. Ratatouille works very well.
           It's a bit late in the year to be making it, but thanks to the fine autumn, last week there were still plenty of red peppers/capsicums, aubergine/eggplant and courgettes/zucchini around. (Interesting how all these relatively recent additions to our vege supply have at least two and often three or more names - French, Italian, English, sometimes American.) I use tinned tomatoes - even in high summer, unless you live somewhere warm and grow your own, we just don't get sufficiently ripe, red, luscious tomatoes. But it works best with plain crushed tomatoes, not flavoured ones.
           I can and still sometimes do make the proper version, using lots and lots of olive oil. But I've also evolved a lighter one that fulfils what Julia Child says is the cardinal principle for this dish: cooking each vegetable separately first, then combining them briefly, to keep the true flavours. The one I made left out the eggplant. Harvey doesn't like it, and while I do, I prefer it cooked by itself in something like eggplant parmigiano. Besides, the colour does look very pretty without it.
           You can make any quantity you like - all that matters is keeping a roughly even balance of veges. For my birthday, two very large brown onions, three large red peppers, three tins of tomatoes and about ten small courgettes, plus garlic and oil, made more than enough to feed 14 people as a side dish. The big white Spanish onions are by far the best to use, but even Moore Wilson doesn't seem to have them any more. If anyone knows how I can get them in Wellington, please let me know.

Revised Ratatouille
Large brown onions - or red ones if you prefer, but peel off the tough outer skins
Extra virgin olive oil
Well-ripened sweet peppers - I like red but you can use orange, yellow, or all three
Small/medium courgettes
New Zealand garlic
Extra virgin olive oil - not Spanish
Black pepper and salt
Sugar (optional)
Flat-leafed parsley

Cut the ends off the courgettes and slice them lengthwise in long even strips, 4-6 strips per courgette (depending how thick they are). Put them in a large bowl, sprinkle them with salt and set aside while you prepare and cook the other veges. (If you want to include eggplant, treat it the same way.) Remove the tops, white bits and seeds from the peppers and slice them in long even strips no more than a centimetre wide. Finely chop the garlic - 2 or more cloves.

Hold a mouthful of water in your mouth while you deal with the onions (I got this tip out of a recipe in the paper one day, and it seems to cut down or even eliminate the tears). Peel, slice off the bottom and the top, and take a downward slice off each side (save these solid bits for soup or something). Slice thinly down through the onion from top to bottom, not across it - the slices will cook better. (I push mine down, side-first, through the slicer blade on the processor.)

Put the onions and garlic and a good gloop of oil (depending on how much onion you have) into a wide shallow ceramic or glass dish and cover for the microwave (I use a rubber and plastic lid, it saves having to use plastic clingwrap). Cook for a few minutes until just tender (I use the "fresh veges" setting). Remove to another bowl and set aside.

Use the same dish to cook the peppers until they're softened but not limp, with another gloop of oil, and set aside. Drain and rinse the courgettes, and cook the same way - no need to add more oil to them, the drops of rinsing water are enough. Be careful to just cook them, they shouldn't be completely limp. You can make it all in advance to this point.

Gently heat a large wide frypan - non-stick is good - with another tablespoon of oil, and put in each vege in alternate layers, sprinkling a little chopped parsley over each layer. Add enough tinned, crushed tomatoes to provide moisture and a good balance of flavours. Heat gently through, and add freshly ground black pepper and salt to taste. A very small teaspoon of sugar can be a good addition at this point (especially if the peppers were not deeply coloured and ripe).


This is good by itself with crusty bread, or to go with roast chicken, beef or lamb. It can be served either hot, warm or cold. You can add pieces of fresh lean chicken to any leftovers to make a quick chicken stew, or use it as a pasta sauce.

Sunday, May 23, 2010

Birthday boursin


I've been slow to post again this week because I've been having a birthday, with more than one celebration involving different groups of people. One of the things I made to give them was  - no, sorry, not a Ken cake - a boursin. It's a savoury cream cheese that my French friend Diane taught me how to make, but she says the recipe must be credited to her friend Thérèse, of Arras. You need to make it the day before you want to serve it. And you need to use proper cream cheese - Diane says Philadelphia works best - not "lite" or spreadable.

Boursin
300g cream cheese, cut into small cubes
30g chilled butter, cubed
2-4 cloves garlic, finely chopped
A good pinch of "gros sel" - ideally this should be imported Limousin salt, but I have to admit (sorry, Diane) that I use ordinary rock salt
salt and black pepper, to taste
pepper steak seasoning (Masterfoods) - enough to go in the cheese and also coat the outside
fresh chives, finely chopped (optional)


Put the cream cheese, butter, chives if you're using them, and seasonings, including a good shake of the pepper steak seasoning, into a bowl large enough to use a potato masher in. Carefully and patiently mash everything together until it's all well blended.

Shape the mixture gently into a round about 6 cm high and 9 cm in diameter, with a flat upright edge and flat top and bottom (like a thick slice from a cylinder). (Diane said mine needed to be a bit higher and not as wide across.) Cover a flat plate with pepper steak seasoning. Starting with the side of the round, carefully roll the cheese in it to coat it evenly all over. Refrigerate overnight. Take out of the fridge an hour before serving.


I serve this with either little bits of toast or very plain crackers. It's salty, garlicky, peppery - delicious. Have a look at Harvey's latest blog post, "Taste Buds" - it's all about food too, including some of the other things we ate for my birthday.
                                                                                                                                            

Sunday, May 16, 2010

The "Food" Show

I managed to get to the Food Show for a couple of hours on Saturday - long enough to take in two celebrity chef performances and do a quick whizz around all the stalls.
          I suppose I should have realised beforehand, but apart from the performances, there wasn't all that much actual food involved - though of course, like everyone else, I tried plenty of free samples. I noted lots and lots of oils and condiments - sauces, dips, spreads, rubs (many of which, to me, tasted either artificial or too vinegary); lots of alcohol - wine, spirits, liqueurs; and a good smattering of local and imported chocolate (including one stall that was a bit neglected, because it had made the mistake of not offering any free samples) and ice cream (including a yummy but pricey new Limoncello one). A bit of cheese (I bought Barry's Bay ones for Harvey, as he comes from Banks Peninsula), and plenty of sausages and bacon, from either happy pigs or (if you asked) much less happy pigs.


Not a happy pig (left - see Love Pigs for more information) and happy pigs (below - Freedom Farms).


I was a bit surprised to find out that two well-known brands of happy pig products are distributed by companies selling the other kind, but the SPCA lady explained to me that because our markets are too small, this is the only way to do it. They are working, she said, on sourcing free-range chicken meal for ethical pet food. It hadn't occurred to me to worry about this.
           The two shows I saw were by Ross Burden and Annabelle White. He (understandably) abandoned his irritating ultra-suave, Brylcreemed Masterchef persona, as he expertly juggled the cooking of three dishes single-handed. They were very ably designed to showcase Hawkes Bay products - Esk Valley wines and Village Press olive oils - and I'll definitely be making two of them, the Sienese rabbit and the olive oil cake (pisciotta - the recipes are on the Food Show website.)
            But I often felt a bit queasy during his show, for reasons that had nothing to do with the food. Though I liked the pig story, he really needs to get a new line in jokes that don't seem so contrived, or depend on slyly slinging off at non-whites, non-men, and non-straights. I wasn't the only one not laughing.


Annabelle White was a complete contrast. Her dishes were utterly down-homey (like most of mine), and I didn't learn much. (Her Honey Apple Crisp could be Harvey's idea of a perfect apple crumble, I'll try it.) But she did have one good tip that was new to me: when you cook pasta, put half a peeled raw potato in the water - the starch it releases will make the sauce cling to the pasta better.
            In terms of presentation, she was top-notch, an accomplished comic turn, way better than anyone I've seen in the Comedy Show line-up. Good-hearted, perfectly timed, nicely staged verbal and physical jokes - all genuinely funny, and the whole audience loved it. Her show alone was worth the ticket price.
            So I came home and for dinner I made grilled lamb rack with parsnip, potato and garlic mash, and carrots with honey and walnuts. Harvey was very happy.

Friday, May 14, 2010

Friday Smoked Fish Pie


I've always loved the sweet flavour of smoked fish. Of course it's better if it's a gourmet kind. Wellington's new Hill St Farmer's Market (Saturday mornings) sells superb fresh and smoked fish caught off the Wairarapa coast. But perfectly ordinary and often quite cheap supermarket smoked fish is not to be despised.
          Harvey's mother boiled smoked fish in water and served it with spuds. Mine poached it in milk with a bit of butter, and served it on hot buttered toast. I follow her, and Harvey has graciously got used to it. After I've poached it briefly in milk, it might turn into kedgeree or some kind of fish pie. It's the contrast between the creamy fish and the crisp pastry that I like, plus the fact it's so easy.
            Tonight I made a pie using savoury shortcrust pastry. For guests I would have made my own, but I had some ready-made sheets in the freezer. These quantities will serve four moderate eaters, or two hungry ones.

Smoked Fish Pie

Square, shallow baking tin and baking paper
250g  smoked fish
300 ml milk
a few pieces of butter
1 small onion, chopped finely
1 small red/yellow/orange pepper, seeded and chopped
2 Tbsps finely chopped parsley (preferably flat-leaved)
White sauce/bechamel (see the post on mushrooms for the recipe), made with the milk used for poaching the fish plus a little more milk and/or cream, so it's not too stiff
1 and 1/2 sheets savoury short-crust pastry
1 egg, beaten with a little milk, for glazing

Heat oven to 200C. Cook the onion and pepper in a little butter until soft, and set aside. Gently heat the milk with a little butter in a wide shallow pan and poach the fish for a few minutes, turning once, until the edge flakes easily. Remove fish to a plate, dark skin side up, scrape off the skin (it should come away very easily), flake the fish and remove any bones.

Make the white sauce using the poaching milk. Season, but go easy on the salt, as the fish is already quite salty. Pour the sauce into the poaching pan. Gently stir in the fish, cooked onion and pepper, and parsley, adding a little more milk or cream if necessary to keep it all moist but not runny. Taste for seasoning.

Line tin with baking paper to cover the bottom and come well up the sides - it can stick out at the top a bit. Press 1 square of pastry into the tin so it comes up the sides about 1.5 - 2 cm. Pour in fish mixture.

Cut remaining half sheet of pastry into strips and use these to make a lattice on top of the fish, with the ends of the strips pressed into the pastry sides - it works best done catty-corner across the tins. (As you can see, mine's quite rough - I was hungry!) Brush the whole top of the pie with the egg glaze.

Bake for 30 minutes, then lift out of the tin, using the sides of the paper sticking up around the pie, and place on a board ready for cutting. Serve with salad or whatever cooked veges you fancy.

You can also make large or small smoked fish envelopes using squares of puff pastry - I got this idea from a long-lost magazine clipping. Put a neat pile of the fish mixture (not too much) in the middle of the triangle that forms one side of the square, then brush the edges of the square with the egg, fold it over the fish and press the edges together firmly to make a triangle-shaped pasty, and glaze the top. Bake several of these on an oven tray lined with baking paper for about 20 minutes at 210C.

Monday, May 10, 2010

Hunting humble apple crumble

I don't normally use a recipe for apple crumble, I just guess. But wanting to make a really good one for a weekend visitor, I decided to hunt for guidance on the web.
      As you might expect, apple crumble must be one of the most-posted NZ recipes. What surprised me was how different they all are - not just in ingredients, but in quantities, methods, oven times and temperatures.
       I was struck by how many commercial recipe sites there are, often trying to sound like a real person, and all touting for business. I was shocked - shocked, I say! - to see the New Zealand Women's Weekly featuring a "Classic Apple Crumble", using cans of diced apples. (I expect this kind of heresy from Wattie's Food in a Minute, and sure enough, it had canned apples too, plus jam.) Saving time? Not really - it also says to rub the butter in by hand, when it's much quicker to do it (by careful pulses) in a food processor. I haven't tried melting the butter and stirring it in, as some recipes say - would this work? I'm doubtful.
        The Woolworths recipe uses fresh apples, but tells you to cook them first. So does Jamie Oliver (the only non-NZ recipe I looked at). I thought the whole point was to put fresh sliced apples (maybe with other fruit) under the topping, then cook the whole thing slowly in the oven along with something else that takes a while, like a casserole.
        Oven times and temperatures are another bone of contention. Lots of recipes with precooked apples, or even sometimes with sliced ones, say 20 minutes at 180C, and that's just not long enough. My old Easy As Pie textbook says not to have the oven too hot, or the fruit "will bubble up and spoil the topping" - but Harvey says that's exactly what he wants it to do.
          He's a stickler for tradition - he likes his topping thick, and made with white flour only. Others are more adventurous. As well as the basic butter, sugar (choose your kind) and flour (white or wholemeal, with or without a little baking powder), toppings can include a little or a lot of rolled oats, coconut, ground almonds, and/or spices. The amount of butter varies from skimpy (producing dull, stodgy topping, in my experience) to generous.

Very few recipes give the number of servings. Jamie says his serves 5, but the whole raw topping weighs only 125g - barely a quarter of a cup each, which does seem a bit sparse.
         In the end I went for a Cuisine recipe, because it used fresh, not precooked apples and had a unique variation I wanted to try: mixing the rolled oats with honey and half the butter, melted, then baking them for 20 minutes spread out on a tray lined with baking paper, before mixing them with the butter/flour, sugar, and cinnamon, and cooking for 50 minutes at 180C.
         It tasted good, with a nice toasty flavour, but because the apples weren't proper cooking ones (like Ballarat), I think they needed to cook a bit longer (with foil over the top to stop it getting too brown). And despite its name, we like our crumble a bit less crumbly and more sort of solid. Fewer rolled oats, more flour, maybe more butter.
           If you have a favourite apple crumble recipe you love and swear by, let me know. But please, no canned apples.

Wednesday, May 5, 2010

Moreish mushrooms

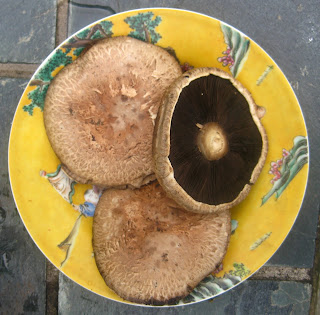
We didn't eat a lot of mushrooms when I was a kid - I think they were much harder to buy then than they are now. Of course they're best picked at dawn with the dew still on them in a fresh green field with birds pouring out their full-throated morning chorus etc etc. But fresh green mushroom-studded fields were a bit scarce in Mt Eden.
           If that was the only way to get mushrooms, they'd be permanently off the menu for most of us. I lose patience with those who insist it's hardly worth eating veges that aren't gathered from the wild (ha!), home-grown, or, at the very least, organic. We're much better off being able to buy different kinds of cultivated mushrooms locally than not having them at all.
           I used to think there wasn't all that much food value in these strange fleshy fluted things, but apparently I was wrong. They're about 85 percent water, but they're also high in fibre and rich in potassium, phosphorus, magnesium, iron and calcium, as well as in vitamins B1, B6, C, H, and folic acid (which is rare in most veges). So there.
           My favourite way to eat the biggest, fattest ones is creamed, on or with buttered toast. You start with a basic white sauce (béchamel sounds better), and as you add the mushrooms they release their juices and turn it a marvellous dark stormcloud colour. It's a very simple dish, perfect for brunch or lunch, but it does need to be carefully made to taste as it should.

Creamed mushrooms with toast
As many big black mushrooms as you need - at least 4 for 2 people, depending on mushroom size

For the sauce (I usually guess now, but these are the correct proportions):
30 grams butter
30 grams plain white flour
About 450 ml (1 and a 1/2 cups) milk (full milk is best, but trim will do)
Seasonings
salt and freshly ground black pepper
nutmeg
splash of brandy (if you're feeling extravagant)

Remove tough ends of stalks and cut the mushrooms into chunks (roughly 2 cm square). Place in ceramic or glass microwave dish, cover and microwave for 1-2 minutes on medium high, just to soften them. (You can skip this step, but I find it helps commercially grown mushrooms cook more easily in the sauce later.) Set aside.

Heat the milk in a large glass jug in the microwave, in 30-second bursts on high, until it's close to boiling (watch it). Melt the butter in a heavy-bottomed saucepan over the lowest possible heat. Take off the heat and rapidly stir in the flour, using a wooden spoon. Return to heat and cook gently, stirring all the time to keep lumps at bay, until (says Julia Child) "the butter and flour froth together for 2 minutes without colouring". Take the pan off the heat and slowly pour in the hot milk, stirring madly as you go. Put pan back on low heat and cook the mixture gently, stirring all the time, until it thickens to a smooth sauce. If it seems to be getting too thick, add more milk, a little at a time (but see note about mushroom juice below).


Add the mushrooms and any juice with them (if they've been microwaved), then add seasonings to taste. A little finely grated nutmeg is essential. The brandy, if you've got any, is very nice too - just a tiny splash. Cook for a few minutes more, until the mushrooms are tender, the sauce is dark and it tastes right. (The thickening of the base sauce as it cooks is diluted by the mushroom juices being released, so it should all end up neither too thick nor too runny.)

Take the pan off the heat while you make the toast with any good bread you like, and butter it (with butter, I hope. Some people prefer crisp toast buttered when it's cold, but I am not among them.)  Heat the plates, gently reheat the mushrooms, and serve with more black pepper handy. If you like (and we often do), you can have crispy bacon on the side, but you'll have to fit in making that too, or have help.


And if there's a bit left over, I add more milk and some mushroom powder (or, dare I say it, a packet of mushroom soup - Julia would kill me, but too bad), blend it and turn it into nice soup for a weekday lunch.